Getting Started with GDSwell
# Copyright 2026 Helge Gehring, Simon Bilodeau and contributors.
# Licensed under the Apache License, Version 2.0.
# ---
# jupyter:
#   jupytext:
#     text_representation:
#       extension: .py
#       format_name: percent
#       format_version: '1.3'
#   kernelspec:
#     display_name: Python 3
#     language: python
#     name: python3
# ---
Getting Started with GDSwell
This tutorial introduces the core concepts of gdswell: Cells, Layers,
and Cell References.
Defining Layers
In gdswell, we recommend defining GDS layers using an Enum for clarity and type safety.
from enum import Enum

import gdswell as gw
from gdswell.components.text import text


class Layers(gw.Layer, Enum):
    WG = (1, 0)  # Waveguide layer
    TEXT = (2, 0)  # Text/Label layer
Creating a Simple Cell
All components in gdswell are defined as functions decorated with @gw.cell.
Let’s start with a simple rectangle.
@gw.cell
def rectangle(w=10, h=5, layer=Layers.WG) -> gw.Cell:
    """A basic rectangular cell."""
    c = gw.Cell()
    c.add_polygon([(0, 0), (w, 0), (w, h), (0, h)], layer)
    return c
Higher-Order Cells: Cells as Inputs
A powerful pattern in gdswell is creating “higher-order” cells that take other Cell objects
as arguments. This allows you to build reusable wrappers, decorators, or complex assemblies.
Here, we create a labeled_component that takes any component and adds it as a reference,
along with a text label on top.
@gw.cell
def labeled_component(component: gw.Cell, label: str = "Block") -> gw.Cell:
    """Wraps a component cell with a text label."""
    c = gw.Cell()

    # 1. Add the component as a reference (instantiation)
    # We place it at the origin of our new cell
    c.add_ref(component)

    # 2. Add a text label
    # We use the component's bounding box to position the label
    bbox = component.bbox()
    label_size = bbox.height() / 3
    label_cell = text(text=label, layer=Layers.TEXT, size=label_size)

    # Place label near the bottom-left of the component
    c.add_ref(label_cell, origin=(bbox.left + label_size / 2, bbox.bottom + label_size / 2))

    return c
Building a Hierarchical Layout
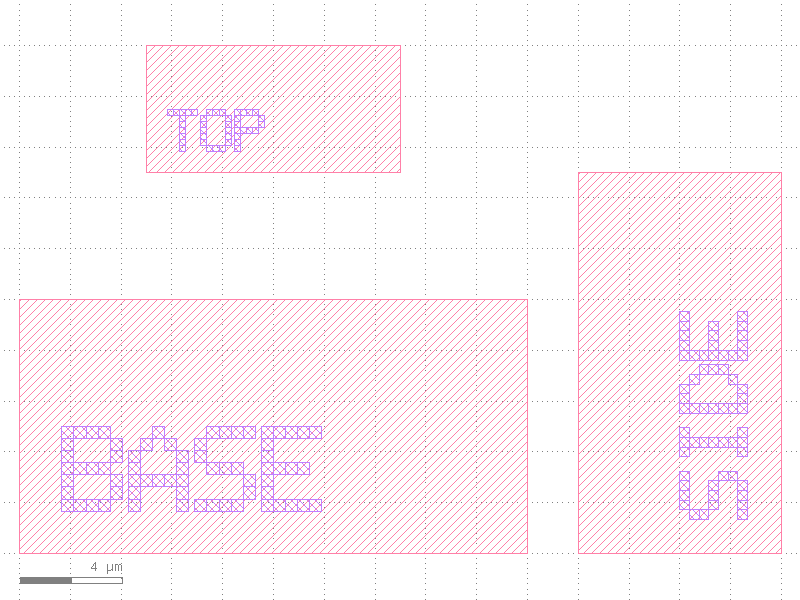
Finally, we can compose multiple instances of our labeled_component into a top-level layout,
applying transformations like translation and rotation.
@gw.cell
def hierarchical_layout() -> gw.Cell:
    top = gw.Cell()

    # Create several labeled versions of our rectangle
    rect1 = rectangle(w=20, h=10)
    rect2 = rectangle(w=15, h=8)
    rect3 = rectangle(w=10, h=5)

    # Add them as references with different labels and positions
    top.add_ref(labeled_component(rect1, "BASE"), origin=(0, 0))

    top.add_ref(labeled_component(rect2, "SIDE"), origin=(30, 0), rotation=90)

    top.add_ref(labeled_component(rect3, "TOP"), origin=(5, 15))

    return top
Inspecting Instances
When you add a reference using .add_ref() or .add_ref_connected(), you get an Instance
object. You can easily access its position and transformed ports.
top_cell = hierarchical_layout()
inst = top_cell.instances[0]

print(f"Instance name: {inst.name}")
print(f"Position (x, y): {inst.position}")
print(f"Individual coordinates: x={inst.x}, y={inst.y}")

# Accessing ports on the instance (automatically transformed to the parent's coordinate system)
print(f"Available ports: {list(inst.keys())}")
Instance name: labeled_component_6e70a005_6512e5a8_0
Position (x, y): (0.0, 0.0)
Individual coordinates: x=0.0, y=0.0
Available ports: []
Visualization
Rendering our hierarchical layout:
c = hierarchical_layout()
c